12 Fat Quarters for $15

The pattern below uses just two fat quarters, you could make 6 bags for $15. All before the big night!
TRICK OR TREAT BAG
My niece informed me that our youngest baby does not have his own trick or treat bag! This will not do! I decided to recreate a bag I made a few years ago and share the pattern here with you – all my quilting lovelies!
You will need:

2 fat quarters
3/4 yard decorative trim (optional)
1 fat quarter size of interfacing or thin batting (optional)
The usual: Your sewing machine, thread, etc.
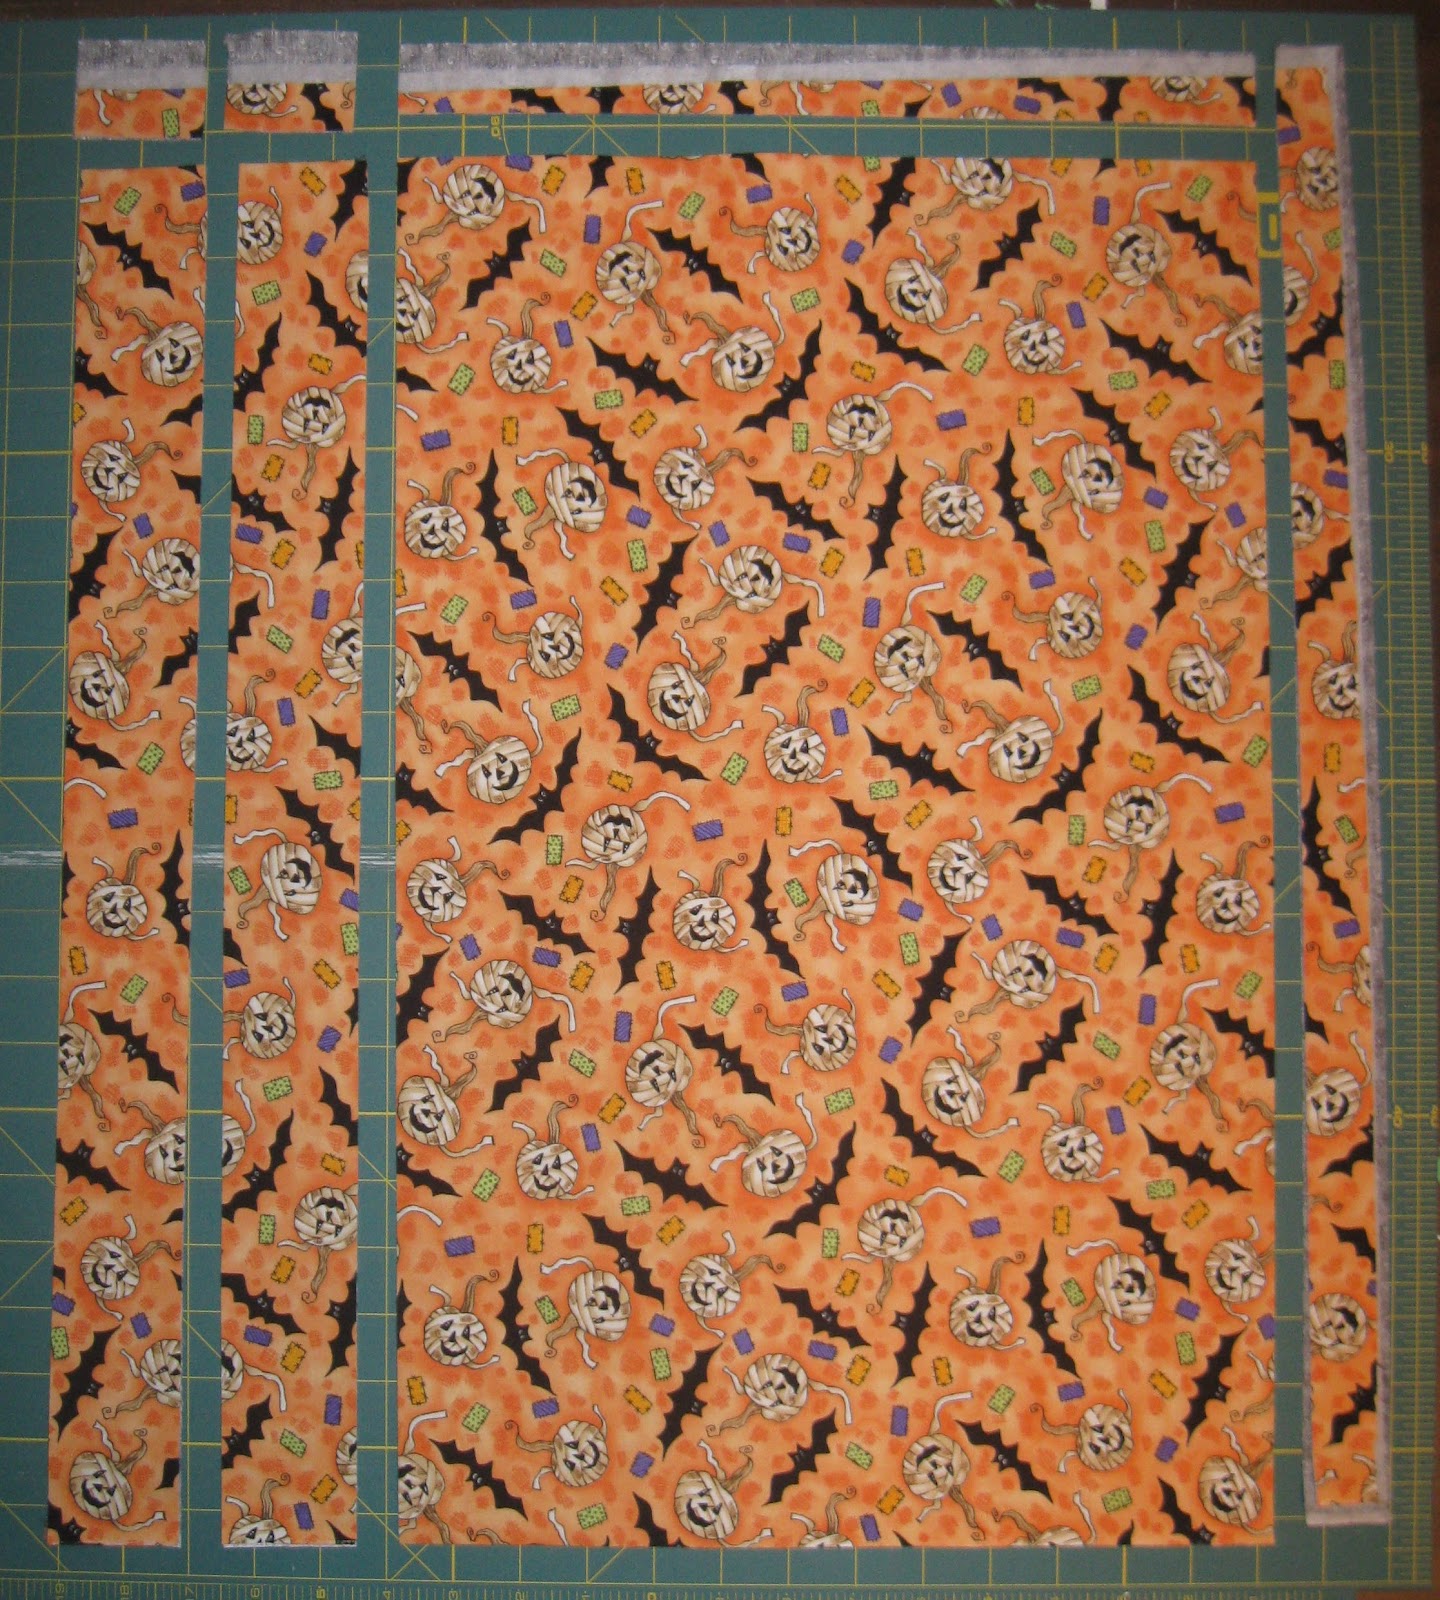
Cutting the fat quarters:
I laid my fat quarters one on top of another and cut the
following pieces:
2 - 2" x 20" (those are the ones on the left)
1 - 13" x 20" (the big piece)
I wanted to use an
interfacing to give my bag some body, so I laid it right between the fat
quarters while cutting. A fusible interfacing would work great. You would fuse it to the back of your fat quarter BEFORE cutting it out.

Time to get sewing! For purposes here I will call the pieces by the colors I used.
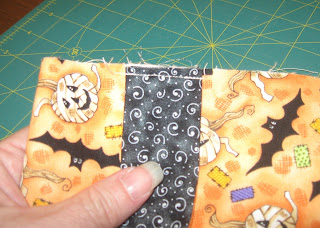
Place one black strip and one orange strip right sides together. Sew 1/4" from the edge along both long edges.

Turn the straps right side out and press. You will have two straps for your bag.
I always do these first. They are a pain to turn right side out. I feel so much better knowing they are done!

Fold the fabric onto itself right sides together so it now measures 13" x 10". Stitch 1/4" from the side and bottom, leave the top open.
 Next is a little trick that will make the bottom of the bag boxy. It makes the bag hold its shape instead of just lying flat.
Grab one of the bottom corners of the bag and fold it as shown. Measure down 2" from the point and draw a line. It is helpful to use a clear ruler so you can line the seam up vertically and assure your horizontal line is perpendicular to the seam. Just a stickler step, I don't think being a bit off would mess up your bag!
 Pin the corner and stitch along the drawn line. Trim away excess fabric to 1/4".
Repeat for the other corner of the black piece, and both bottom corners of the orange piece.
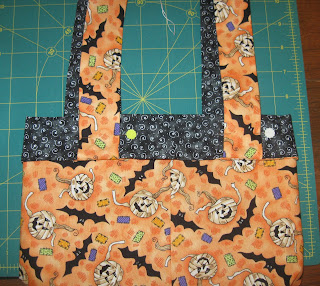
 Pinning the straps:
Turn your bag piece right side out and lay it flat with the seam on the side. Position one of the straps to the bag as shown with right sides together allowing the strap to loop alongside the bag.
You will want each end approximately 2" from each side of the bag. Pin in place. Flip the bag over and repeat for the other side with the other strap.
 Stitch the straps a scant 1/4" from the edge. You want to be slightly less than 1/4" so that when you are done your stitching does not show, it will be inside the seam allowance.
 Place your lining (mine is the black) around the bag as shown. You want the right sides together at this point.
 Match the side seams and pin all around the edge.
 Sew 1/4" around the top leaving a small opening to turn your bag right side out. That opening will be stitched closed later.
 Turning the bag right side out can be a chore. Be patient and work it out slowly. I want to make a birthing analogy, but I am holding back.
 After the bag is right sides out, carefully pin closed the opening and whip stitch closed by hand.
Okay, you can stop laughing now! You know I put that bad boy on the machine and stitched it. I am not going to stop this close to being done for hand sewing. Silly quilter...
 Your bag is finished, or it could be. I am going to embellish mine a bit but it isn't necessary. Just know it is fine to stop at this point and love your new bag.
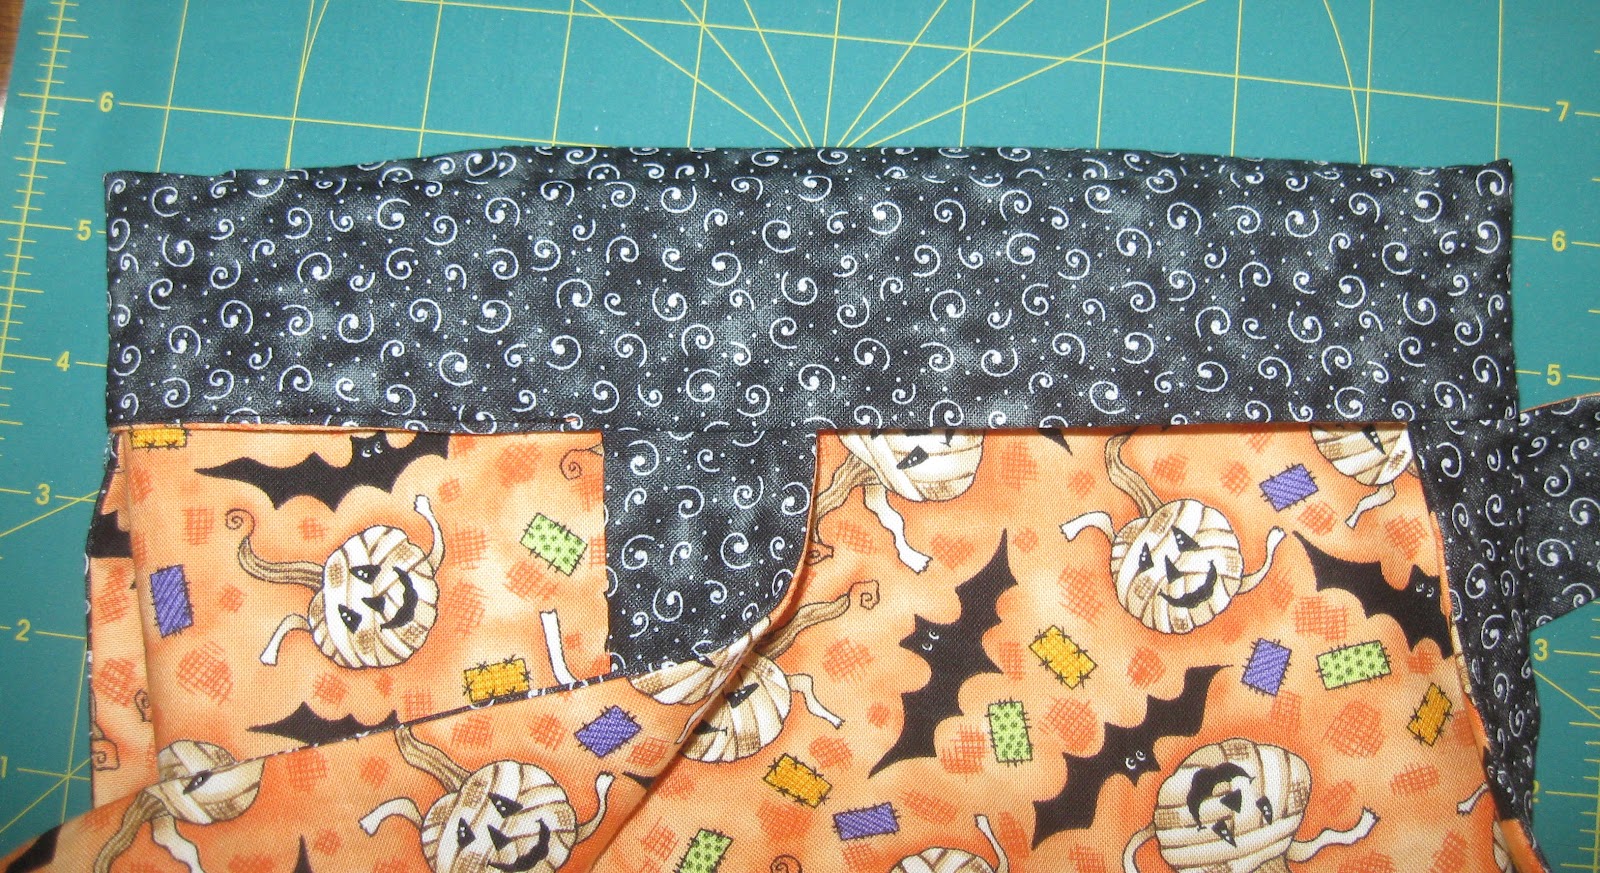
 For my bag, I want to fold down the edge to show off the lining. I turned it down about 1 1/2" from the edge.
 I have to position the straps so they would remain straight and pin it all in place.
At this point if I were a careful quilter, I would machine stitch the fold down before adding the trim.
 You all know I am not careful. I dove right in and began stitching away - adding the trim while stitching down my folded edge. Oh what a rebel I am!
I overlapped the trim when I rounded around and back-stitched a bit. I will be honest, some of the thicknesses required patience but I made it.
 And it is worth it! I love this little bag and I know my little one will be the envy of all the other little trick or treaters with his cute bag on Halloween Night.

Grab one of the bottom corners of the bag and fold it as shown. Measure down 2" from the point and draw a line. It is helpful to use a clear ruler so you can line the seam up vertically and assure your horizontal line is perpendicular to the seam. Just a stickler step, I don't think being a bit off would mess up your bag!

Repeat for the other corner of the black piece, and both bottom corners of the orange piece.

Turn your bag piece right side out and lay it flat with the seam on the side. Position one of the straps to the bag as shown with right sides together allowing the strap to loop alongside the bag.
You will want each end approximately 2" from each side of the bag. Pin in place. Flip the bag over and repeat for the other side with the other strap.


Okay, you can stop laughing now! You know I put that bad boy on the machine and stitched it. I am not going to stop this close to being done for hand sewing. Silly quilter...


At this point if I were a careful quilter, I would machine stitch the fold down before adding the trim.

I overlapped the trim when I rounded around and back-stitched a bit. I will be honest, some of the thicknesses required patience but I made it.
